DiaTest ASM

Automatic Fracture Strength Test
DiaTest ASM combines computer-controlled single particle fracture force testing with size and shape inspection of individual particles. The handling of single particles is automated, providing data on size, shape, fracture strength, and particle image for each tested particle.

Revolutionary.
DiaTest ASM revolutionizes the way we analyze single particles in a laboratory setting.
By integrating computer-controlled fracture force testing with detailed size and shape inspection, this innovative system provides a comprehensive understanding of individual particles like never before. Gone are the days of manual handling – now, the process is automated for efficiency and accuracy.
With DiaTest ASM, valuable data such as particle size, shape, fracture strength, and detailed images are readily accessible for each particle tested, allowing researchers to delve deeper into their analysis and make informed decisions based on comprehensive insights.

Action.
How it Works.
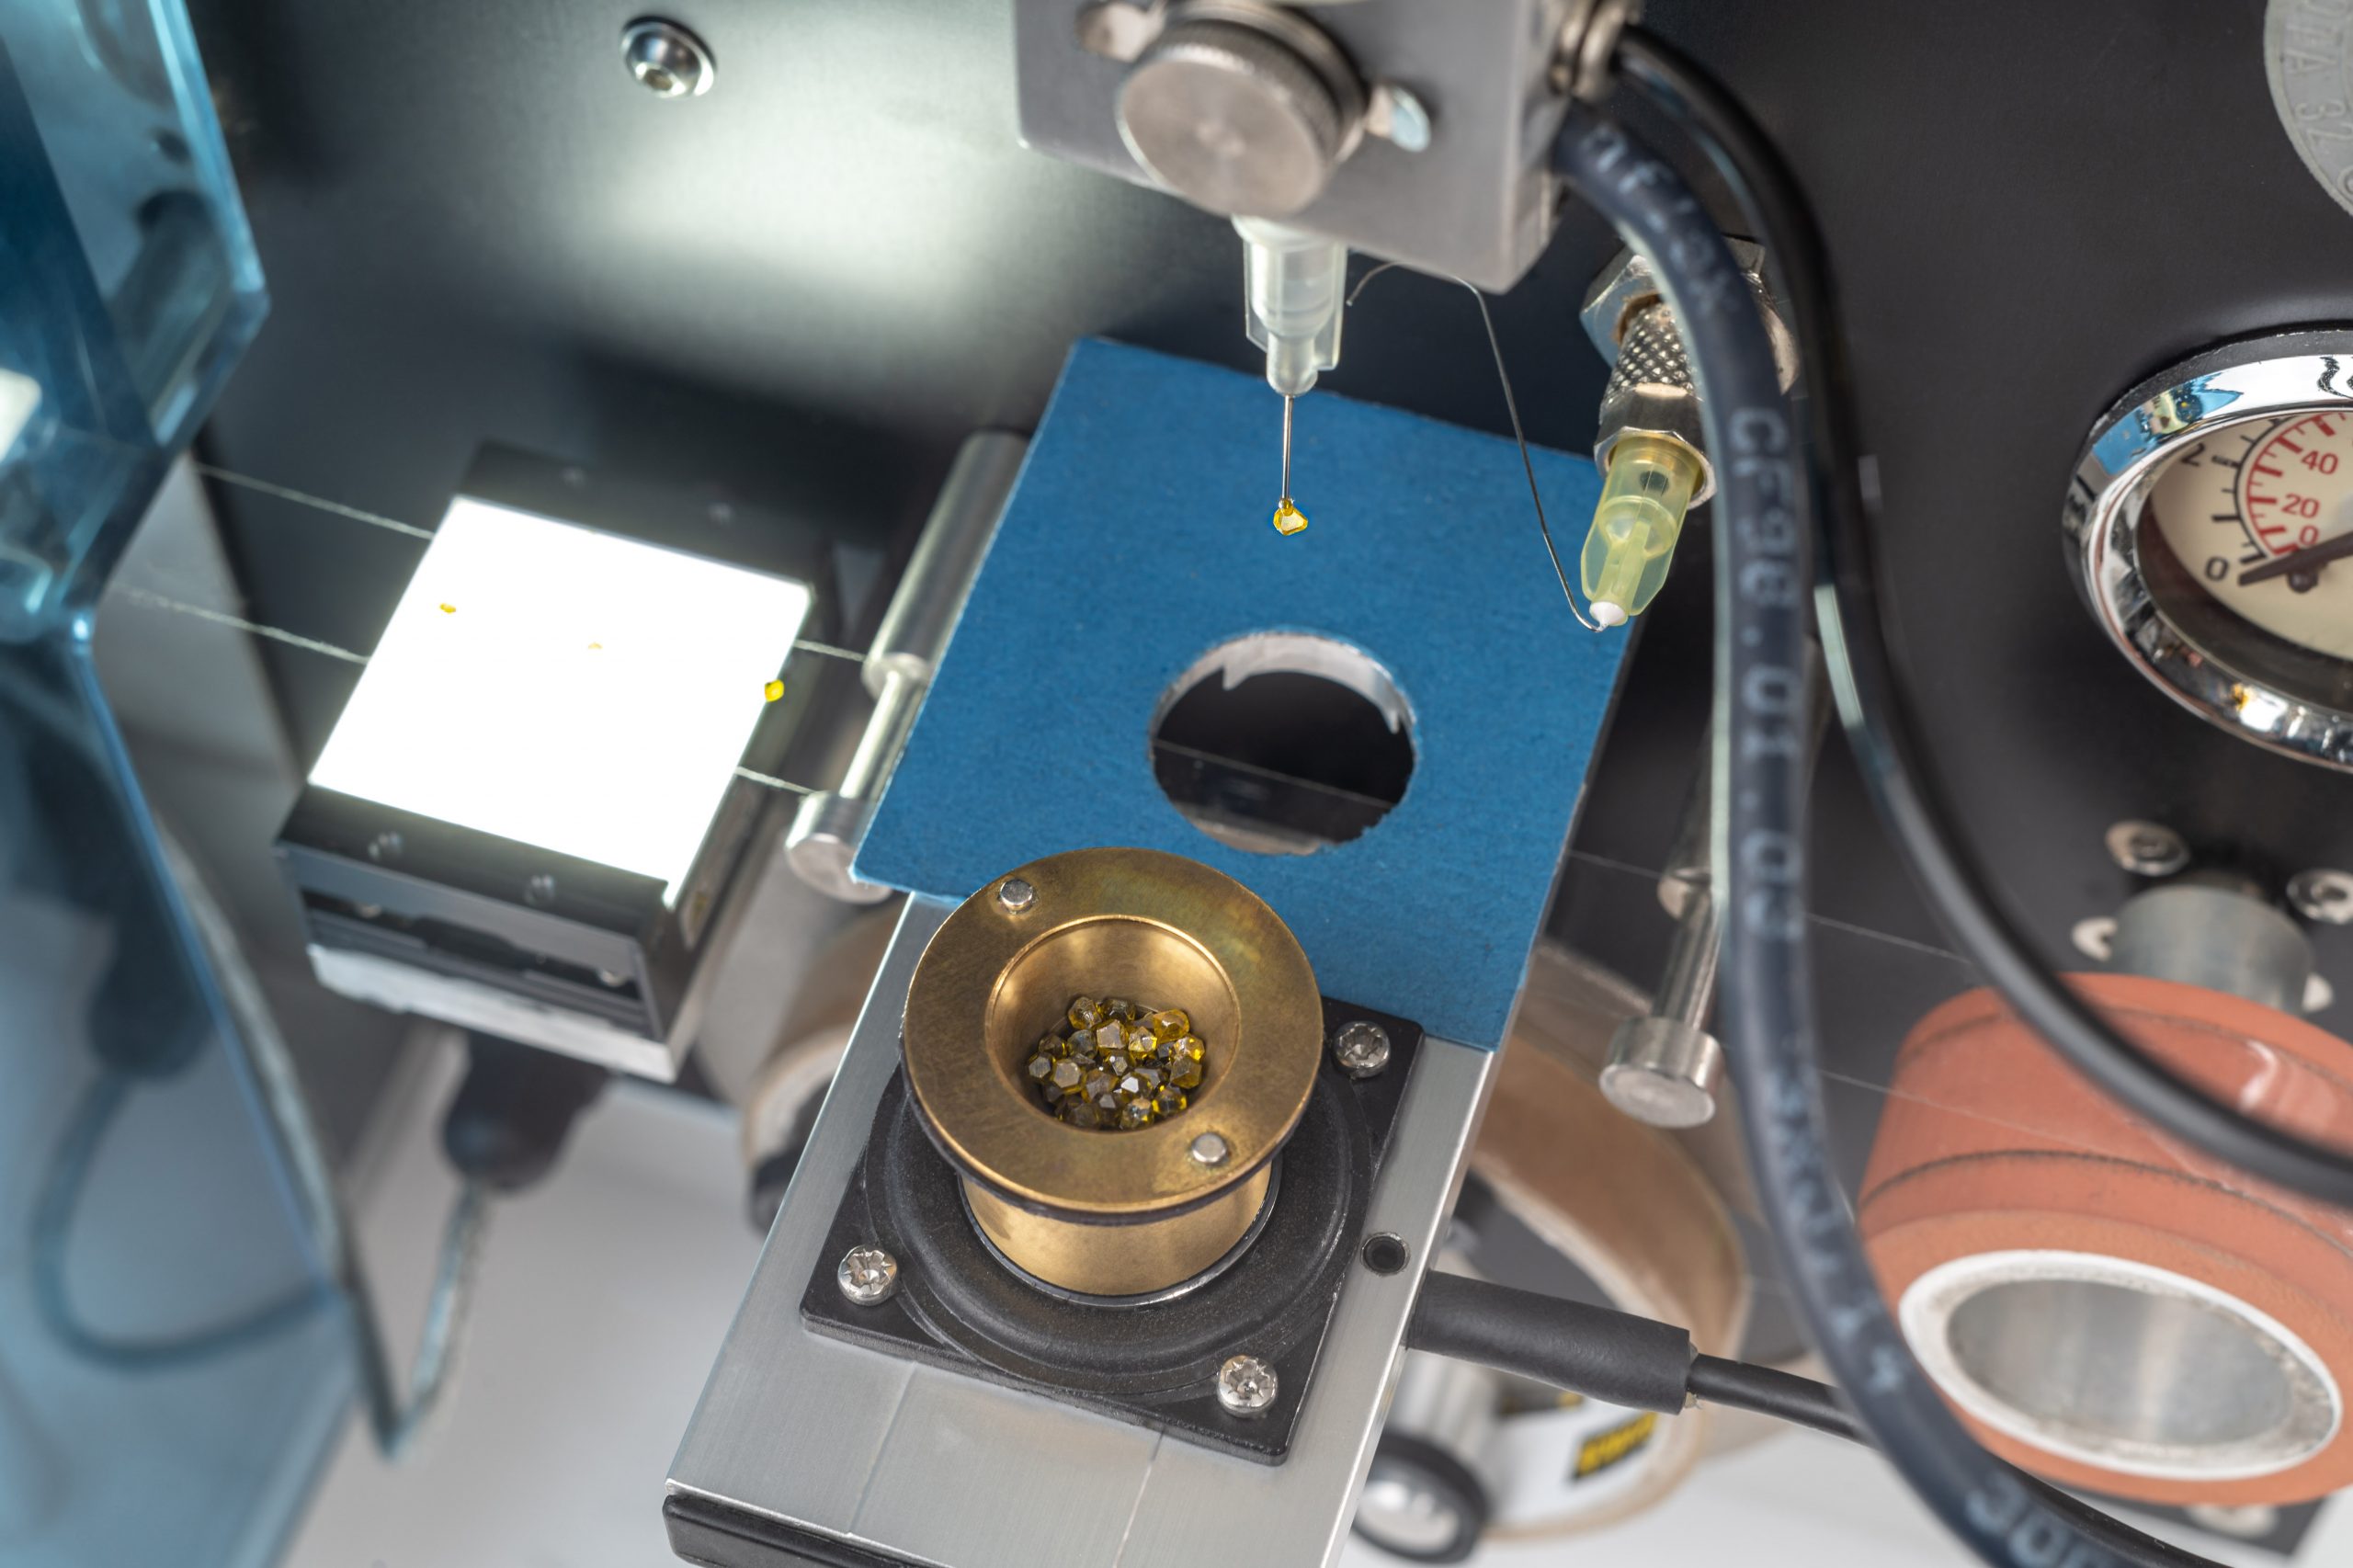
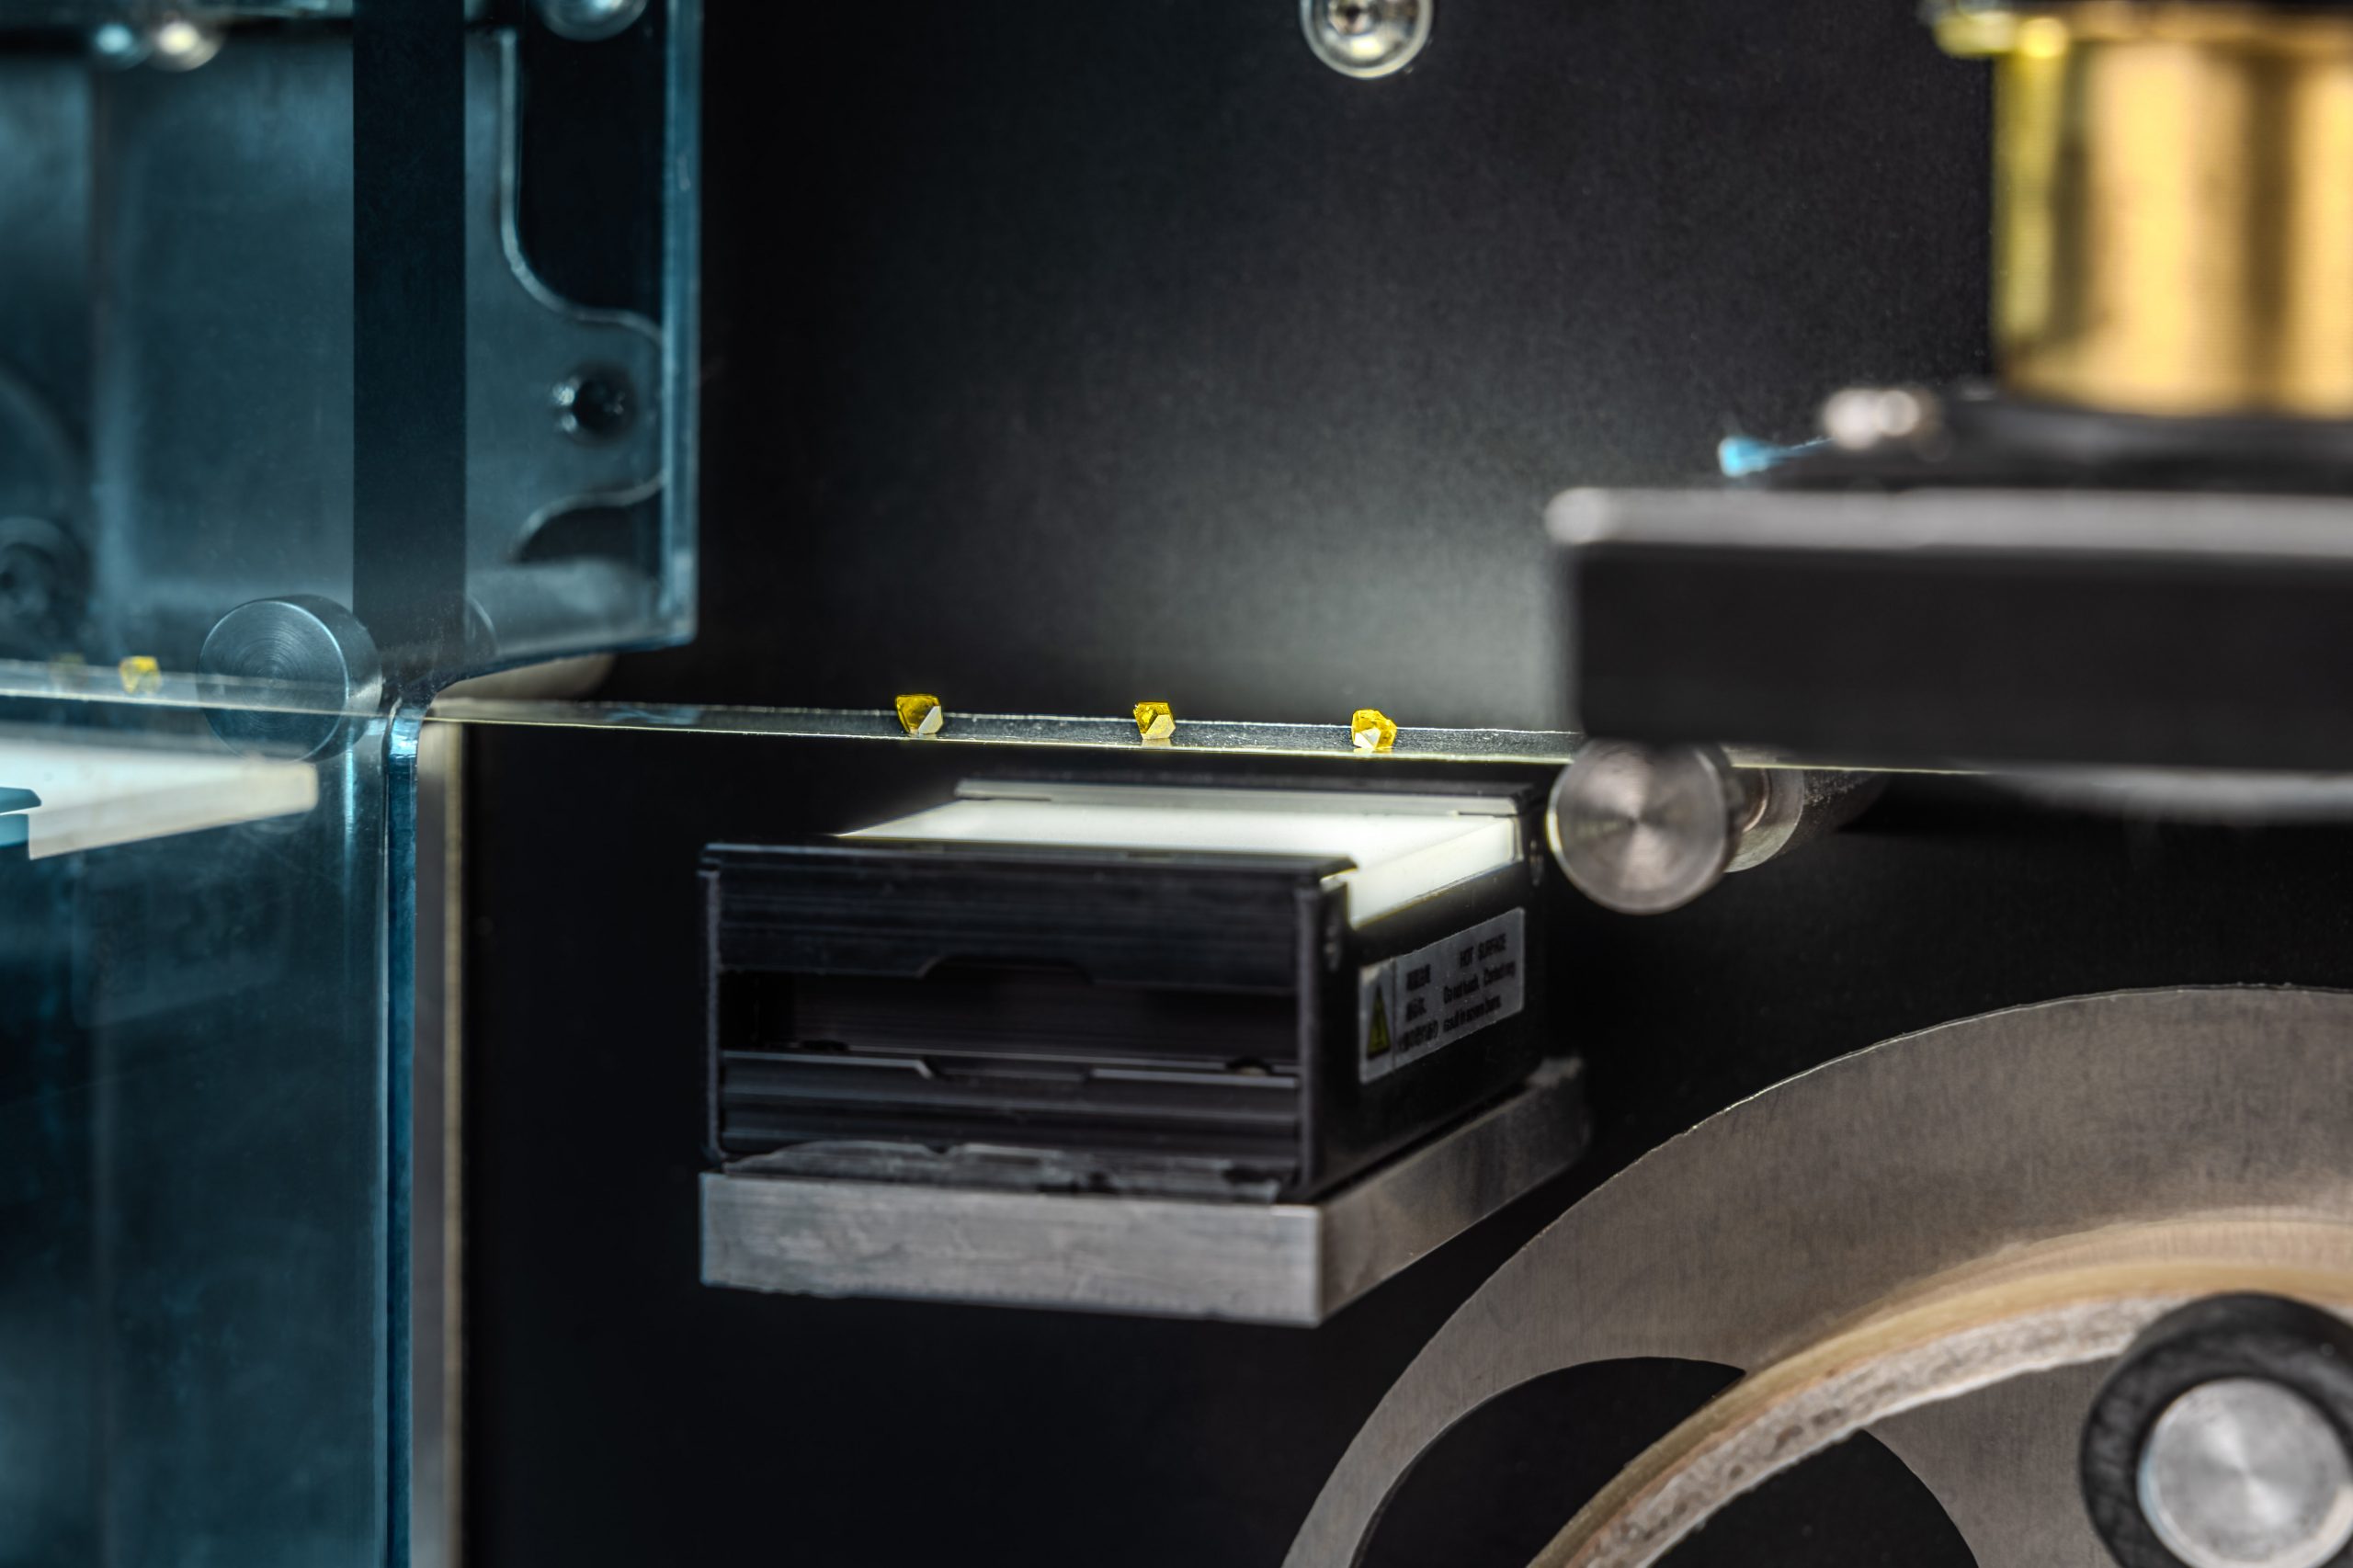
The adhesive tape serves as a carrier for the particles. The pick-and-place system extracts single particles from a container and places them onto the tape, which then transports the particles through the machine.
First, the particles pass under a microscope, where their size, shape, and position parameters are measured. Next, the particles reach the pneumatic press, where a smoothly increasing force is applied until the particle breaks. The compressive fracture force is determined using data on force, time, and displacement. This fracture force is recorded along with the results from the optical particle analysis. Using the fracture force and particle size, the fracture strength is calculated.
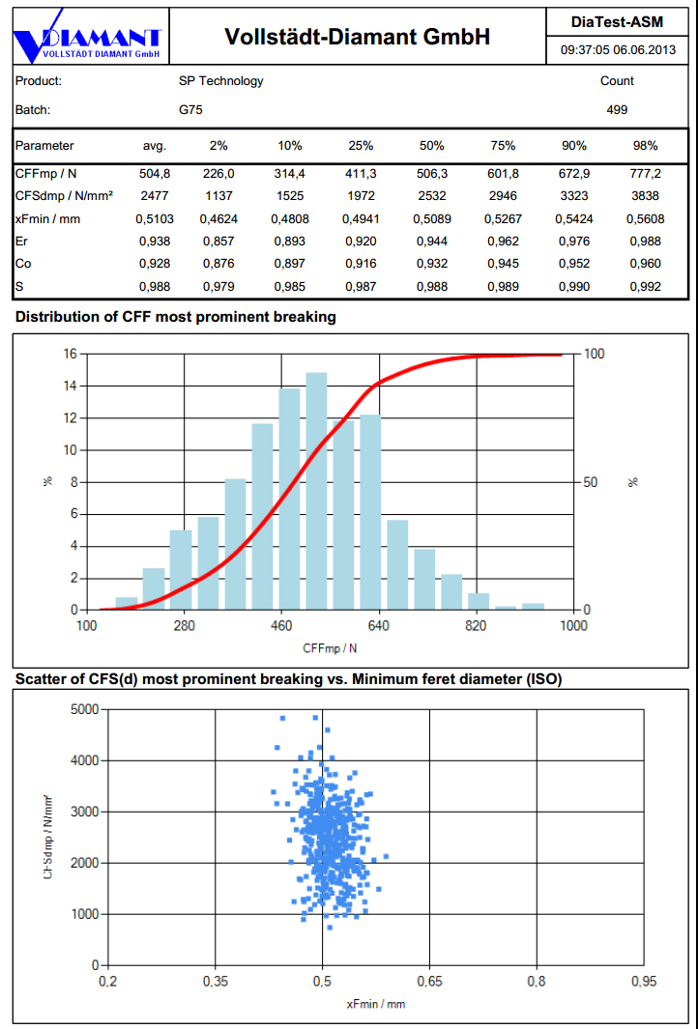
The program generates Excel tables with data from all tested particles, as well as tables and reports with statistical results.
Main Components
The main components include a pneumatic press equipped with a high-precision load cell and an anvil displacement sensor, measuring optics with a camera and lighting, and an extra observation camera. Additionally, an automatic pick-and-place system manages individual particles.
The standard USB 3.0 interface facilitates the connection between the tester and the control computer.
System Interface
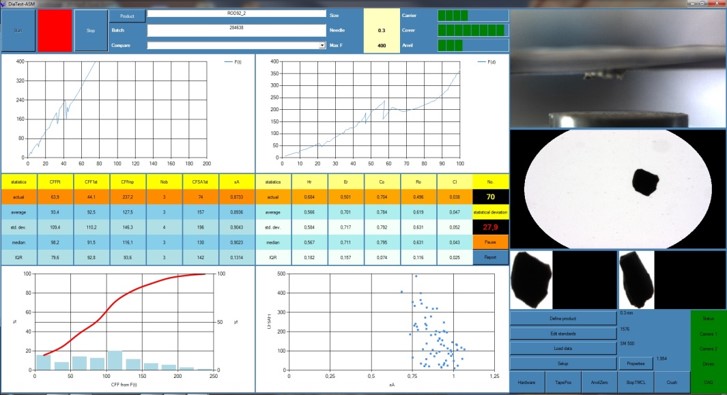
The system’s operation is managed through a user-friendly program interface that operates on a standard PC.
This interface allows users to easily navigate through different functions and settings, making it simple to control and monitor the system. With clear icons and intuitive menus, users can quickly access the information they need and make adjustments as necessary.
The control program enables pausing the measurement process at any point. Data collected is saved on the hard drive and can be retrieved at a later time when the operator decides to resume the task.

Parameters
Extract from the list of calculated parameters for individual particles and the entire batch:
- Compressive fracture force (CFF)
- Compressive fracture strength (CFS)
- Minimum Maximum feret diameter
- Total area
- Convex perimeter
- Moments of inertia
- Feret elongation
- Compactness
- Area equivalent diameter
- Height
- Ellipticity
- Convexity
- Roundness
- Aspect ratio
- Box ratio
- Roughness
- CIELab color coordinates

Results
While a standard report is automatically generated, all results are saved in Microsoft Excel file format. Each batch has its own file containing data for every tested particle. There is also a separate file for each product, summarizing the statistical distribution of measured parameters across all batches associated with that product. Printed reports include selectable data for each batch.
These reports can be customized to focus on specific data points or trends, making them a valuable tool for quality control and process optimization. Additionally, these reports can be easily shared across departments to facilitate collaboration and decision-making. The data is stored in a structured manner, enabling efficient retrieval and analysis whenever needed.
Technical Data
| Power supply | 100 … 230 V A.C. |
| Force application |
Bidirectional short-stroke pneumatic cylinder |
| Input pressure |
6 bar < p < 10 bar |
| Working pressure |
4.2 bar < p < 4.6 bar (adjustable on the device) |
| Measurement range |
Grain size: 150 µm … 2mm, Force: 0 … 2000 N Direct force measurement through load cell additional range: 0 … 200 N |
| Maximum overload |
2300 N (230 N) |
| Resolution |
3 N (0,3 N) (entire device) |
| Max. measuring error |
20 N (2 N) (across all subcomponents) |
| Optical resolution |
4,2 µm / pixel |
| Image size |
1388 x 1038 pixel |
| Anvil material |
PCD |
| Carrier tape |
12 mm clear adhesive tape |
| PC (built-in) |
Windows 11 (64bit) |
| Processing time |
~ 50 minutes per batch (500 particles per batch) |
| Supported languages |
Chinese, English, German (others upon request) |
